 |
||
| > Reader's Photo OX5 by Lockheed Martin |
||
 |
||
| • ADVERTISE WITH US | ||
| • WHO IS MOAB JEEPER? | ||
|

Home > Jeep Articles > Technical & Installation - Engine / Drivetrain > Mounting beadlocks at home |
||||||||||||||||||||||||||||||
 |
||||||||||||||||||||||||||||||
|
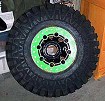
Mounting beadlocks at homeArticle written by Ron PowellDate Added: 06/05/2006 Ah beadlocks! You want them. You need them. And now that you have them, how the heck do you mount them!? |
Your first word of warning: This can be done at home, and it is easy, but it isn?t quick! Expect to invest at least an hour each tire. The only thing I didn?t so myself was the initial mounting of the back side of the tire on the rim. I took them to Les Schwab Tires for that. The creepy crawlers have such a thick sidewall, there was no way I could do it. With different tires, you may be able to do the whole process at home. |
|
|
Installation | |
|
1. Lay out the things you need ( the bolts, nuts, locktite, a torque wrench, tools, and silicone). |
|
2. Place the half mounted tires on the floor with the lock ring up. Ensure the rubber is centered on the rim as evenly as possible; otherwise, the tire will end up out of balance. |
|
|
3. Run a bead of clear silicone around the mounting surface, set on the outer beadlock rim, and sandwich the bead of the tire between the steel rim and the beadlock ring. |
|
|
4. Tighten the bolts in a criss-cross pattern. This allows the ring to tighten evenly. I can?t stress this part enough?if you tighten them unevenly, you?ll never get the ring to seat correctly. |
|
|
5. Torque the bolts between 12-15 ft/lbs in a criss cross pattern. Do this at LEAST 3 times! |
|
|
6. Check them again after airing up the tires and again before you hit the trail. Even using locktite on the nuts, you will still have to check the bolts often. That?s part of the fun of owning beadlocks my friend! |
|
|
7. At this point, you?re ready to seat the back bead of the tire. |
|
|
8. With the beadlock ring up, set the wheel down on a 5 gallon bucket so that everything is off the floor. |
|
|
9. Swab the backside of the rim/tire with soapy water, and start filling the tire (you may need to remove the valve core to get the air in the tire fast enough). |
|
|
10. You?ll hear a loud thump and tire is seated. |
|
|
11. Finish inflating the tire to the desired pressure. |
Final ThoughtsYou can now run single digit air pressure in the tires and go wherever you want. As usual, check the pressure at the trail head, and most of all, enjoy you new-found traction. |
